Choosing the Right Tractor Supply Egg Incubator: Finding Your Perfect Match
Starting your own poultry operation, especially with a focus on sustainability, requires careful planning. One crucial element is selecting the right egg incubator. Tractor Supply offers a variety of options, catering to different scales of operation, from backyard enthusiasts to larger farms. But how do you choose the best one for your needs?
For more information on buying chicks, check out this helpful guide: Buying Chicks.
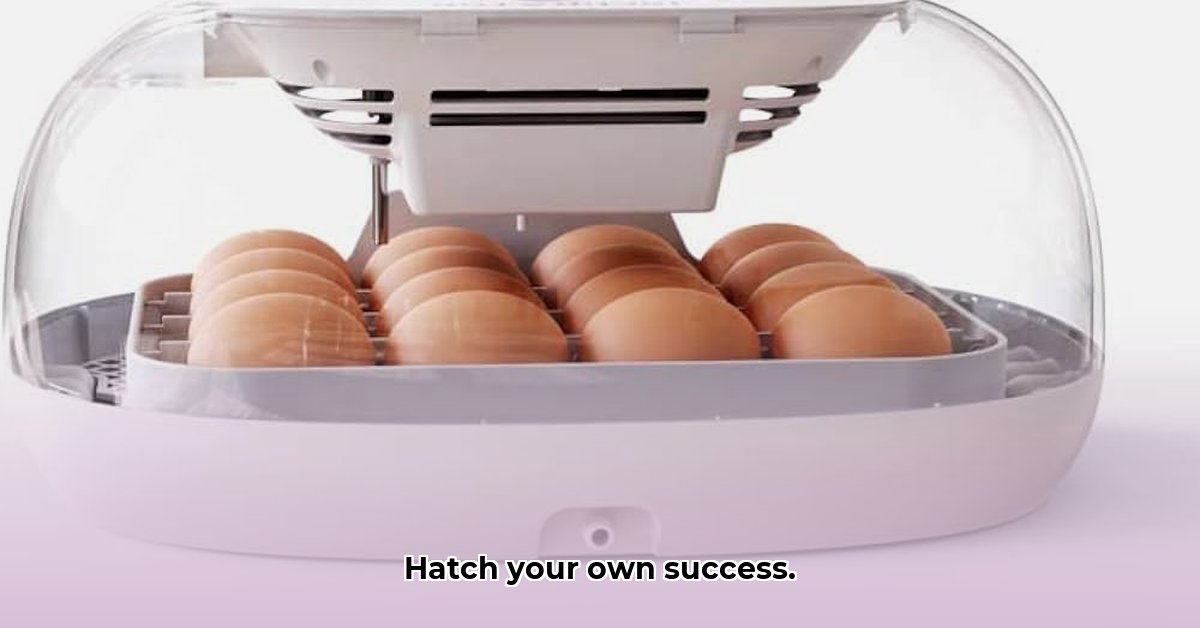
Capacity: This is paramount. How many eggs do you intend to incubate simultaneously? Smaller incubators, perfect for backyard flocks, offer simplicity and ease of management. Larger models, ideal for scaling up your operation, demand more attention to detail and rigorous biosecurity protocols. Consider your long-term goals; starting small allows for gradual expansion.
Automated Features: Automatic egg turning mimics a hen's natural behavior, ensuring even heating and preventing embryo sticking. Digital temperature and humidity controls offer precise environmental management, leading to healthier chicks. While these features add to the initial cost, they significantly increase hatch rates and minimize the time you need to spend tending the incubator.
Ease of Use and Cleaning: Choose an incubator with easy access to eggs for turning and monitoring. Simple cleaning and disinfection protocols are essential for maintaining hygiene and preventing disease outbreaks. A well-designed incubator will save you time and effort in the long run.
Budget: Incubators range in price. Balance your budget with your needs and long-term goals. Advanced features might justify a higher initial cost for larger-scale operations, while a simpler model suffices for smaller flocks. Remember to factor in ongoing maintenance costs.
Did you know that a well-maintained incubator can increase your hatch rate by up to 15%? This translates directly to a more successful and profitable poultry operation.
Setting Up and Operating Your Tractor Supply Incubator: A Step-by-Step Guide
Successfully hatching chicks requires a methodical approach. Here's a step-by-step guide to ensure optimal results:
Step 1: Thorough Cleaning and Disinfection: Before introducing eggs, thoroughly clean and disinfect your incubator using a poultry-safe disinfectant. This crucial step minimizes the risk of disease transmission to your hatching chicks.
Step 2: Egg Selection: Select only fertile eggs from healthy hens. Discard cracked or damaged eggs. Egg freshness also plays a crucial role; aim for eggs that are fresh but not overly old to maximize hatching success.
Step 3: Proper Egg Placement: Arrange the eggs according to the manufacturer's instructions, ensuring even spacing for optimal airflow. Overcrowding can lead to uneven heating and reduce hatch rates.
Step 4: Monitoring Temperature and Humidity: Maintaining the correct temperature and humidity is vital. Use a reliable thermometer and hygrometer to monitor these levels constantly, making adjustments as needed to match the manufacturer's recommendations.
Step 5: Egg Turning (if manual): If your incubator lacks automatic egg turning, follow the manufacturer's recommended schedule for manual turning to prevent embryo sticking and ensure even development.
How many successful hatches have you achieved? Consistent monitoring and adherence to these steps can dramatically improve your results.
Biosecurity Protocols: Protecting Your Future Flock
Biosecurity is non-negotiable for maintaining a healthy flock. A single disease outbreak can devastate your operation. Here’s how to minimize risks:
Regular Disinfection: Regularly disinfect the incubator's interior and exterior using a poultry-safe disinfectant. Follow label instructions meticulously.
Quarantine Procedures: Upon hatching, quarantine the chicks from your existing flock for at least two to four weeks to prevent potential disease transmission.
Waste Management: Dispose of eggshells and waste appropriately, following local regulations, to prevent the spread of disease and attract pests.
Personnel Hygiene: Anyone handling the incubator should maintain high levels of hygiene, including hand washing and potentially protective clothing.
According to Dr. Emily Carter, Avian Veterinarian at the University of Agricultural Sciences, "Implementing robust biosecurity measures is the cornerstone of any successful poultry operation, especially when dealing with large incubators."
Maintenance and Troubleshooting: Keeping Your Incubator in Tip-Top Shape
Regular maintenance is key to preventing problems and ensuring a high hatch rate.
Daily Checks: Monitor temperature and humidity daily, documenting any deviations from optimal levels.
Frequent Cleaning: Clean the incubator regularly to remove debris and prevent the buildup of organic matter.
Troubleshooting: Consult your incubator’s manual for troubleshooting common issues. If problems persist, seek assistance from Tractor Supply’s customer support or a local agricultural expert.
Regular maintenance can save you valuable time, resources, and potential heartache.
Scalability and Future Trends: Expanding Your Operation
While Tractor Supply incubators offer increased capacity compared to smaller models, scaling to truly massive, commercial-scale operations presents unique challenges. Multiple incubators raise costs, space needs, and management complexity.
However, technological advancements offer promising solutions. AI-driven monitoring systems and automation are improving efficiency and accuracy in large-scale incubation. Future incubators may feature automated temperature and humidity regulation, real-time alerts, and data analysis for optimal hatching conditions. Staying informed about these advancements is essential for successful large-scale operations.
Remember, successful egg incubation hinges on meticulous planning, consistent monitoring, and a dedication to biosecurity measures. By following these guidelines, you can boost your flock and enjoy the rewards of fresh, homegrown eggs while contributing to a more sustainable poultry farming practice.